Flaming Bucky
by Scary Terry
|
|
Flaming Bucky by Scary Terry
|
|
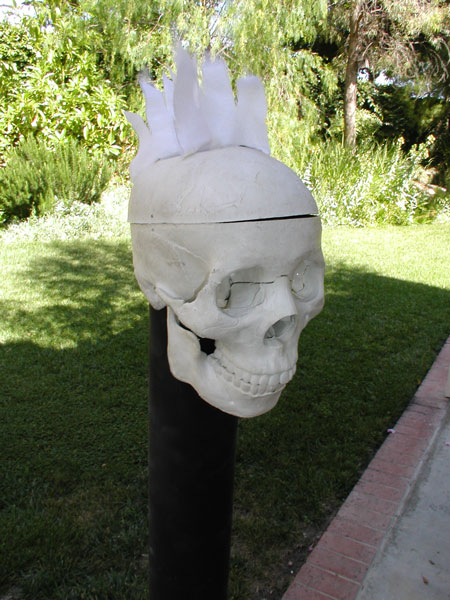
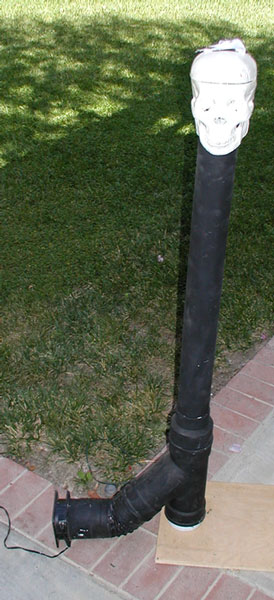
Hi Halloweeners, This prop, that I made several years ago, was inspired by another haunter who put a fan, lighting and fake flame material into a Bucky skull. The problem I ran into in trying to recreate the original prop is that the biggest fan that fits into a Bucky skull is only 3" in diameter and the airflow is marginal. Additionally, I really wanted to put a servo inside the head to drive the mouth and there just wasn't enough room. To solve these problems, I came up with my version of the Flaming Bucky. Instead of mounting the fan inside the head, I use a 4" fan mounted near the ground and PVC pipe to direct the air into the Bucky skull. The air flow from the 4" fan is superior to that of the 3" fan. Additionally, instead of using incandescent lamps, I installed super bright leds and they work fine. The following is not really a how-to, but there should be enough information to get you started if you want to try it for yourself. |
 |
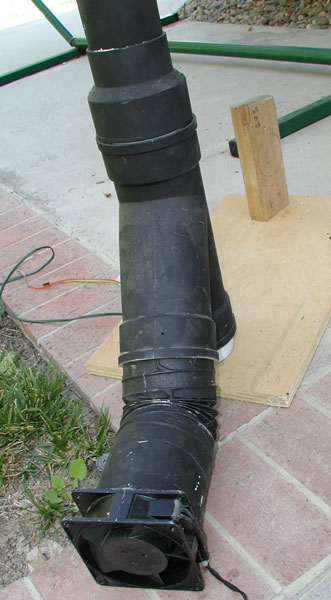 |
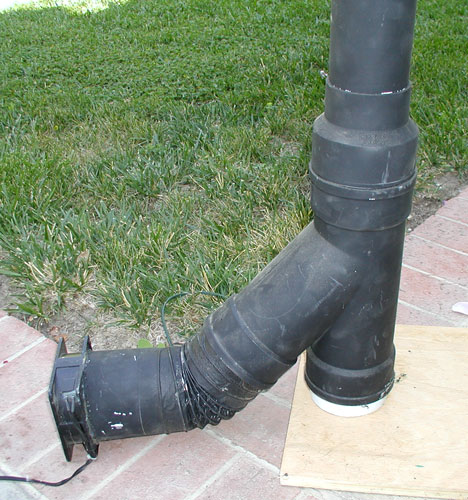
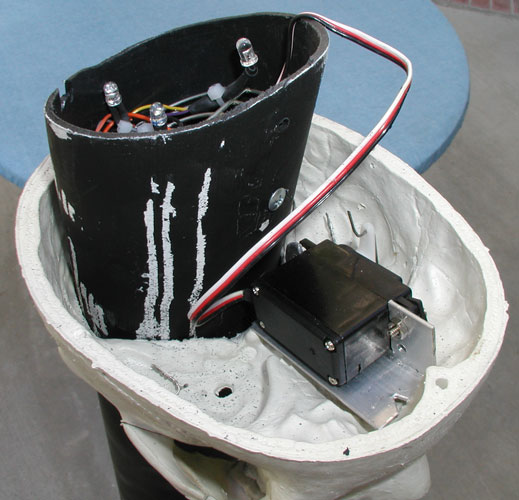
The 4" fan is mounted to a short piece of 4" PCV pipe using hot glue. Next, a piece of flexible duct (dryer duct) is attached using duct tape, which then connects to the leg of a 4" PVC "Y" as shown. The pictures show the "Y" mounted to a board, but in actual usage, I just drive a piece of 4" PVC into the ground and set the "Y" on top of it. This makes for a very sturdy mount. Atop the "Y" is a 4" to 3" PVC reduction fitting (they're joined together with a short piece of 4" PVC). A 3" piece of PVC, cut to the appropriate length, is used to support the Bucky skull. |
|
 |
|
Using a 3" hole saw mounted in a drill press, I carefully drilled holes in the bottom and top of the Bucky skull. The plastic of the Bucky is soft and very easy to drill. Since the outer diameter of the 3" PVC is a little bigger than 3", I used a rotary rasp (a coarse file) mounted in the drill press to adjust the size of the hole in the Bucky to just fit the PVC. Mine came out tight enough that I don't need any fasteners to hold the skull on the pipe. (That's the servo just forward the pipe. Click here for my instructions on how to mount a servo in a Bucky skull). |
 |
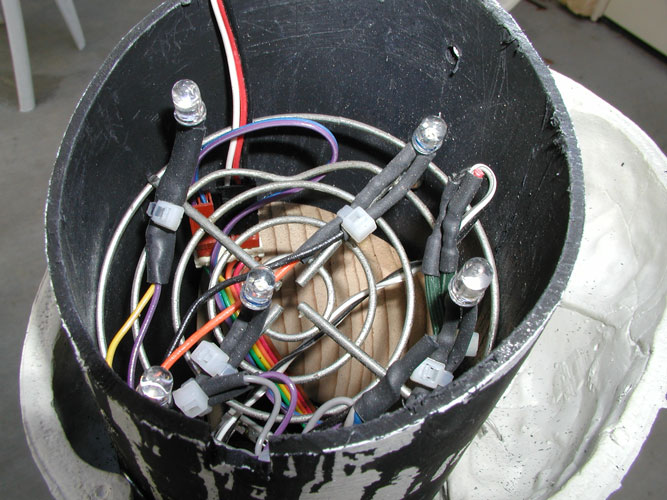 |
I fit a 3" fan guard about 2" down into the pipe on which to mount the leds. I'm still working with the proper number and placement for the leds. Here, you see three yellow and two blue leds. It just takes some experimentation to find the best lighting pattern. The piece of wood below the leds is a speaker mount for Bucky's voice (yes, I do try to cram a lot of items in these things). The speaker restricts the air flow slightly, but it's still very good. |
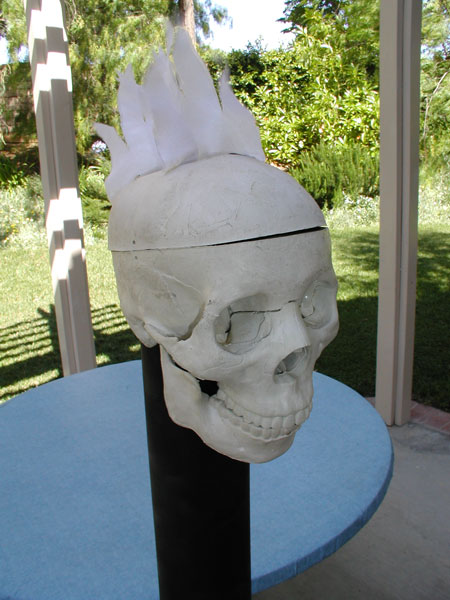 |
The "flames" are made out of silk essence material. They're sewn in an "X" pattern and attached to the skull with hot glue. My flames look pretty hokey in the daylight, but at night, look fairly realistic. | 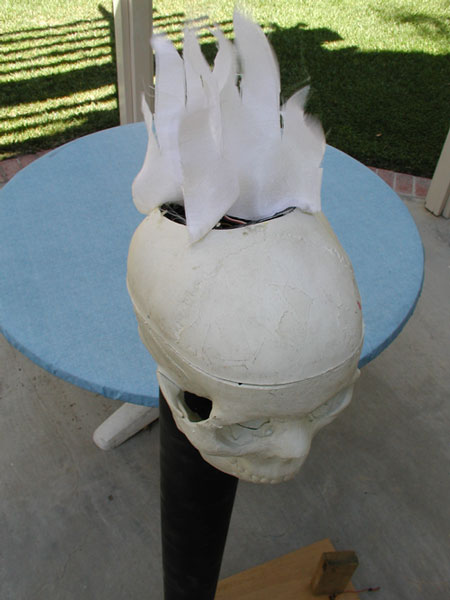 |
| Halloween Home | last updated 1/2009 |