|
|
Many newer GPS
receivers have the ability to create Field Notes that can
be loaded directly to Geocaching.com. What if you don't have
one of these units or just want a quicker way to handle a
large number of cache finds. Here's a way to create Field
Notes using GSAK and Excel. And to make it really easy, if
you have GSAK version 8 or later, it will upload all your
finds to Geocaching.com automatically.
The images below
can be clicked on for a larger view.
Update
11/2013 I've added a troubleshooting section at the bottom
of the page to assist with any problems you may encounter.
|
|
|
|
Step
1:
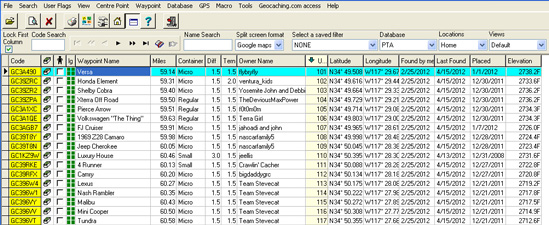
Use GSAK to put
the caches you want to log in the order in which you found them
(or did not find them). This can be done using the Usort
function.
|
|
|
|
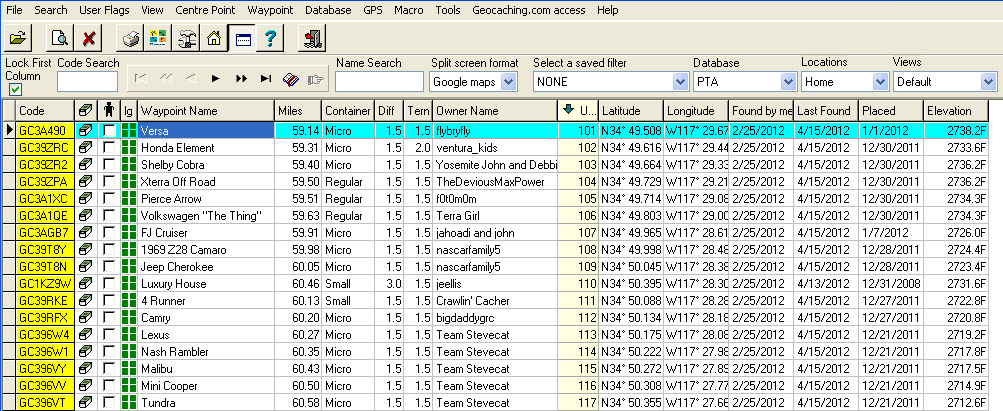
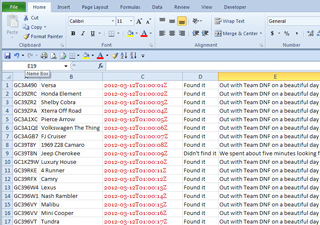
Step
2:
For the "Field
Notes" Excel file we'll be generating, we only really need
the "Code" column from GSAK, in other words, just
the column with the GC numbers, we
will be temporarily deleting the other columns.
However, later
on in Excel, we will also be creating a "Comments"
column (aka Logs) that will contain the remarks you'd like to
make about each cache. Since this procedure is primarily used
for "power caching" runs, it assumes that most of
your comments will be "cut and paste". But, there
are certain instances when you may want to make some cache specific
comments. To help you do this, it's a good idea to include some
extra data from GSAK like the "Waypoint Name" column,
a "Hints" column or maybe the "Cache Type"
column. Another good column to include would be the "Owner
Name" which is useful in personalizing your remarks.
Think about which
columns would be helpful for this purpose then proceed to step
3.
|
|
|
|
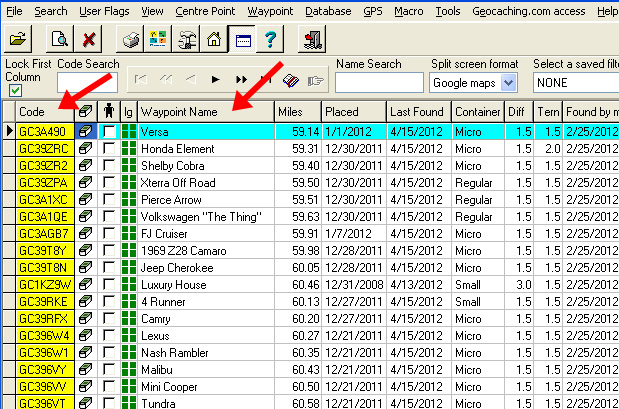
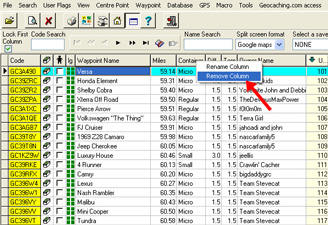
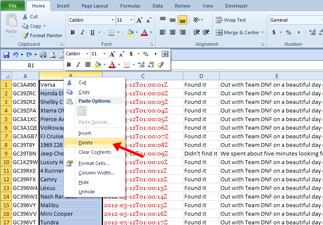
Step
3:
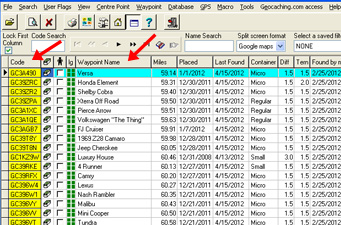
In this example,
we will save the "Code" and "Waypoint Name"
columns and delete the others. Don't worry,
you will not be permanently deleting these columns.
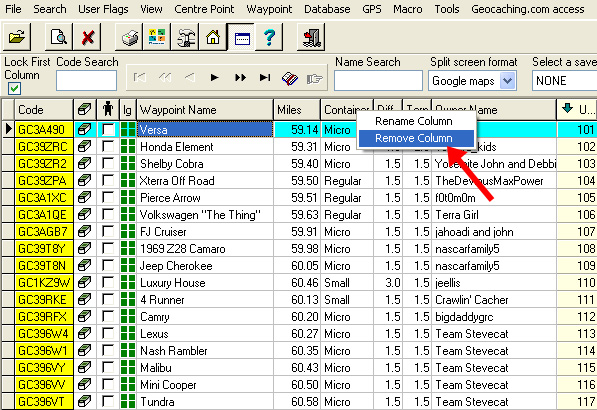
To delete a column,
right click on the top of the column and select "Remove
Column". Do this for all except the "Code" and
"Waypoint Name" columns.
|
|
|
|
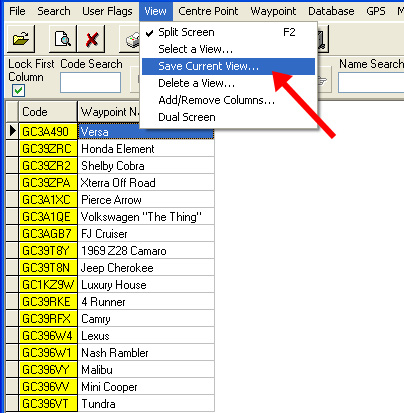
Step
4:
Once you've removed
the columns, click on "View" in the top menu and then
on "Save Current View".
|

|
|
|
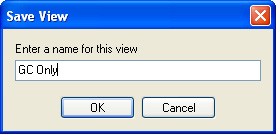
Step
5:
Give this
view a name and click OK.
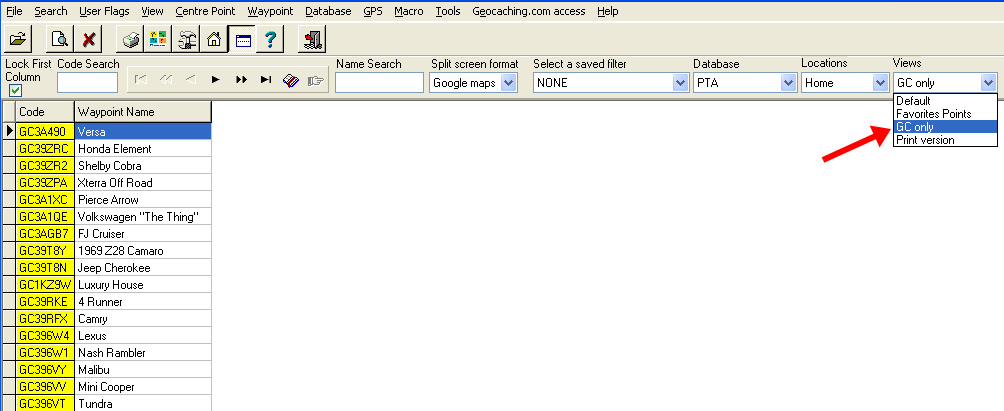
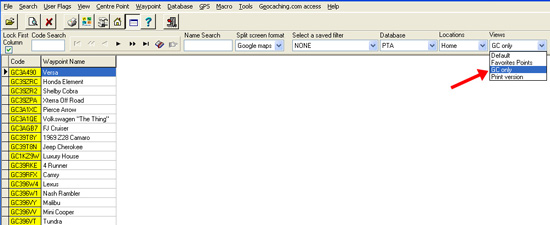
This will
now make the columns you've selected available in the
future without having to go through the delete column
procedure. You can now use the "Views" drop
down menu (shown below) and the "Default" option
to bring back all your columns.
|
|
|
|
|
|
|
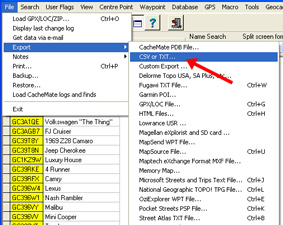
Step
6:
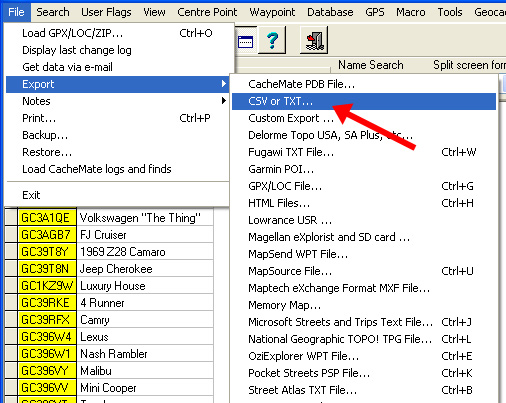
You now have a
list of all the GC numbers and other data for your finds that
can be exported to Excel. To export, click on "File"
in the top GASK menu, then "Export" and finally "CSV
or TXT....".
|
|
|
|
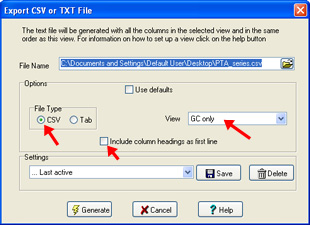
Step
7:
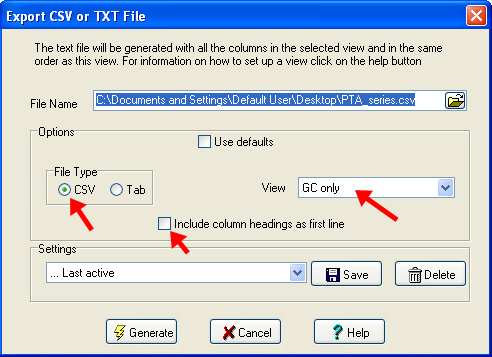
You'll now get
an export box. For "File Name", you'll need to tell
GSAK where to save the file (I save it on my desktop). You'll
also need to give the file a name, just be sure it has the .csv
extension.
- For
"File Type", be sure the CSV radio button is set.
- For
"View", be sure the view for just the GC numbers
is selected (see step 5).
- Uncheck
the "Include column headings as first line" box.
Click "Generate".
|
|
|
|
Step
8:
You now want to
start Excel and open the .csv file
you just created using GSAK.
|
|
|
|
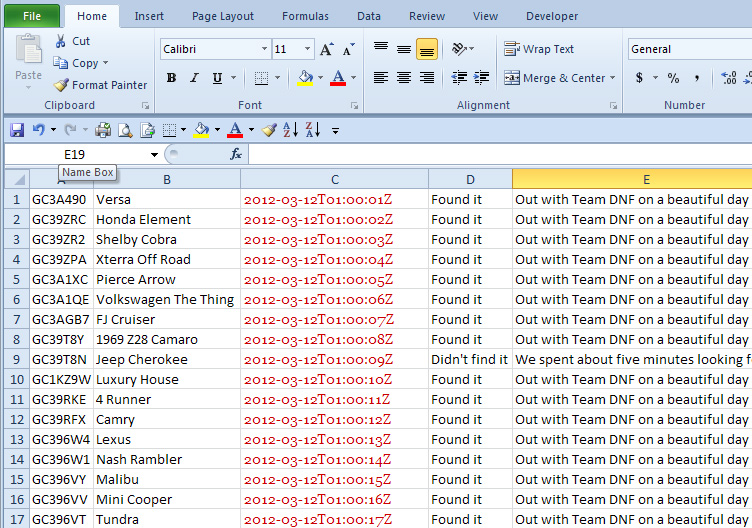
Step
9:
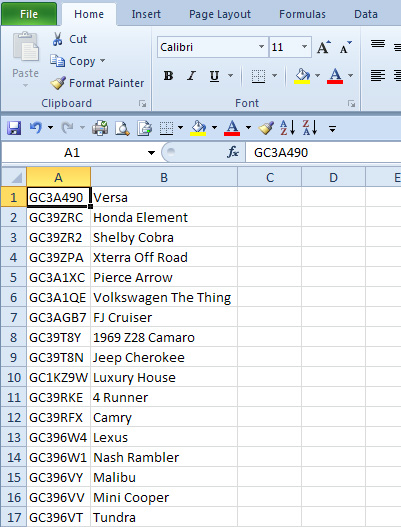
The A column in
your Excel spread sheet should now be populated with all the
GC codes in the order in which they were found. The other data
you imported should be in adjacent columns.
For the "Field
Notes" function to work, besides the GC column, we will
need:
- time
and date information
- "Found"
status
- a
comments section.
We will now add
these three additional columns
|

|
|
|
Step
10:
To keep your finds
in order when they transfer to Geocaching. com,
each cache needs a specific time associated with it. To generate
this time, my Geocaching buddy stantastic
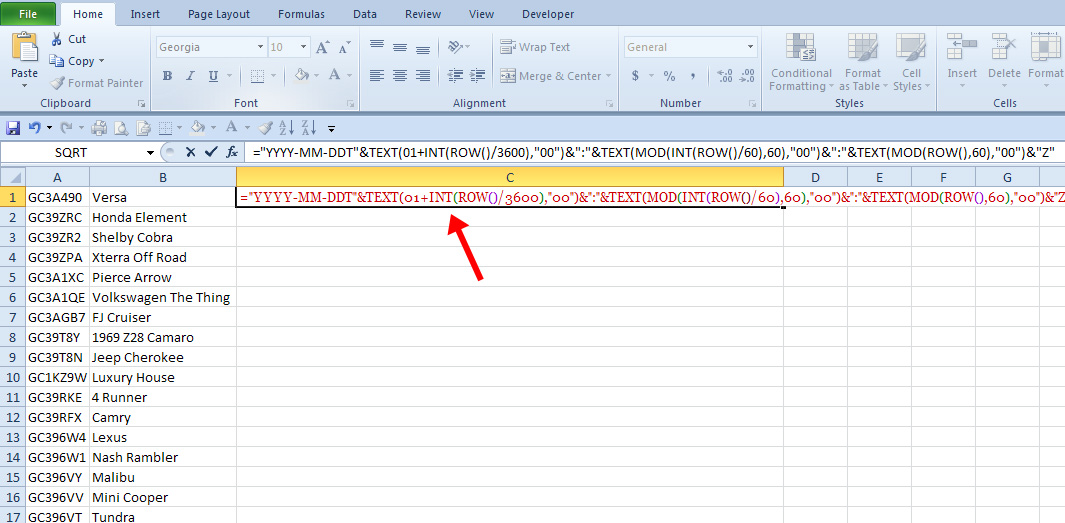
created an Excel formula that will do this automatically. You
need to paste this formula into the top cell of the next open
column (column C in this example):
="YYYY-MM-DDT"&TEXT(01+INT(ROW()/3600),"10")&":"&TEXT(MOD(INT(ROW()/60),60),"00")&":"&TEXT(MOD(ROW(),60),"00")&"Z"
Replace the YYYY,
MM and DD with the appropriate year (4 digits), month (2 digits)
and day (2 digits).
|

|
|
|
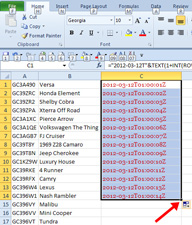
Step
11:
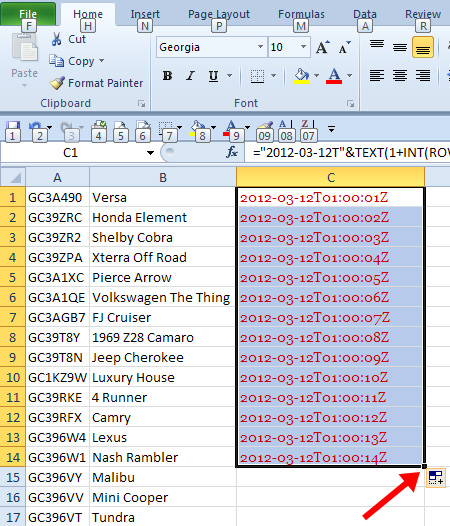
Now, click on the
little box in the bottom right corner of the formula cell and
drag it down adjacent to the last GC number. You'll notice that
the times will increment by one second at each added cell. Magic!
|
|
|
|
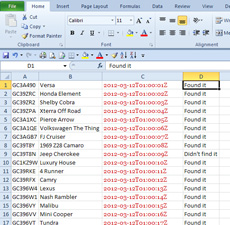
Step
12:
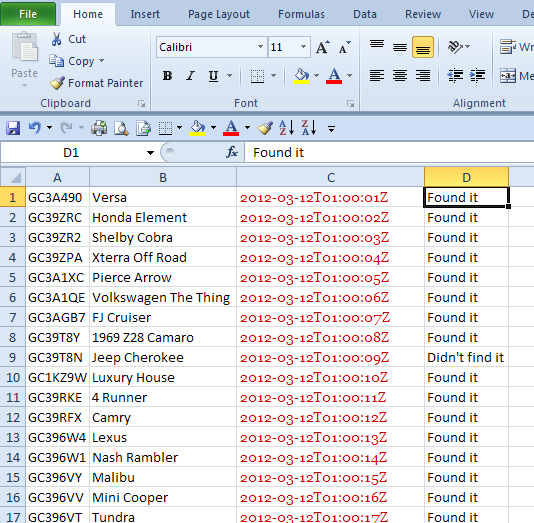
The next empty
column (column D in this example) needs the words "Found
it" or "Didn't find it". This can be handled
just like you did with the date/time column. Type "Found
it" in the top cell and drag the little box down to populate
all the cells. If you had a DNF, you can replace the "Found
it" with "Didn't find it" in the individual cell.
|
|
|
|
Step
13:
The next empty
column is used for your comments that will show up in the cache
log. Just like the previous columns, you can type a message
in the top cell and drag it down to fill all the cells.
This is where the
additional data we imported from GSAK comes in handy. You can
modify your comments as necessary for the "special"
cache finds, just type in what you want to say in the individual
cell.
|
|
|
|
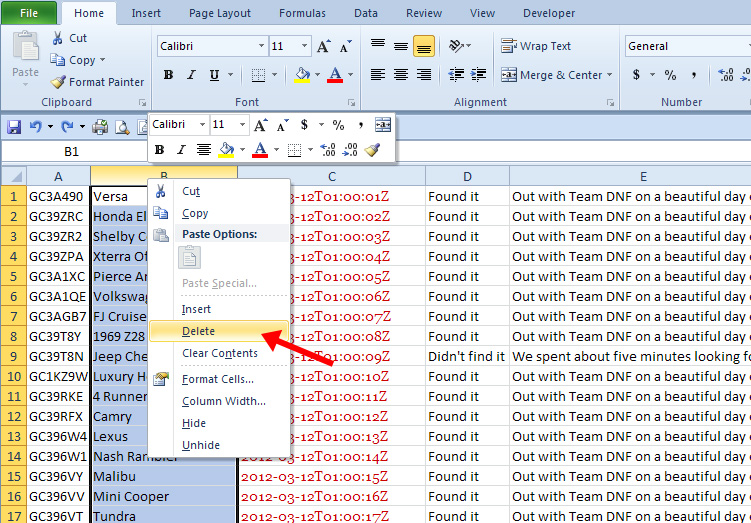
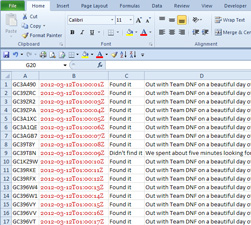
Step
14:
We now need to
delete the extra columns, like "Waypoint Name", that
we imported from GSAK. Right click on the top of the column
and click "Delete".
|
|
|
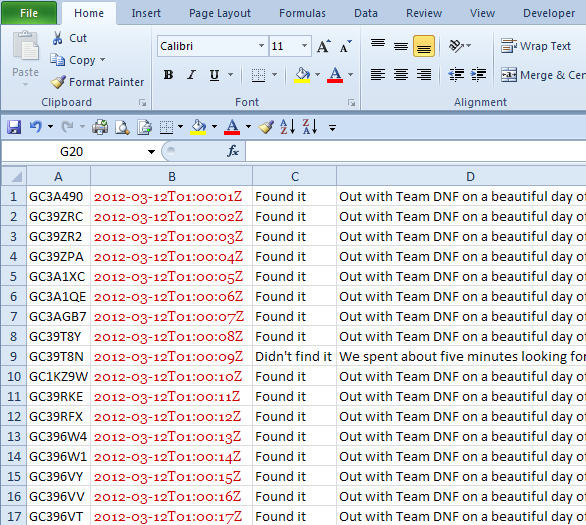
Your Excel table
should now have just four columns:
- A:
GC code
- B:
Date and time
- C:
Found it
- D:
Comments
|
|
|
|
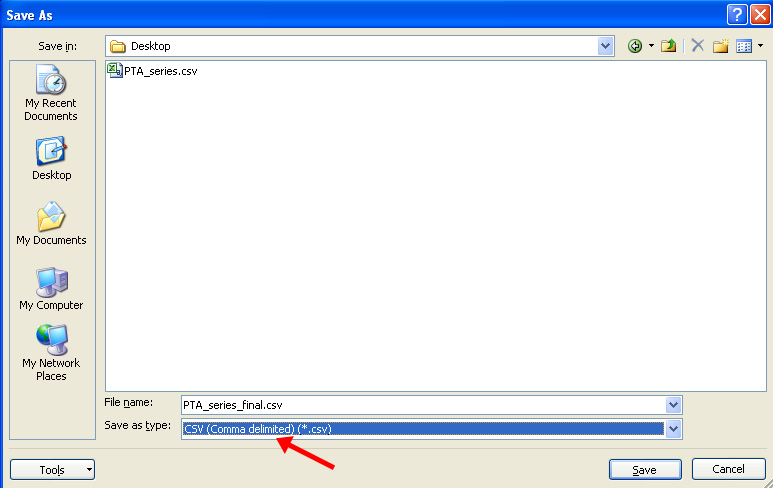
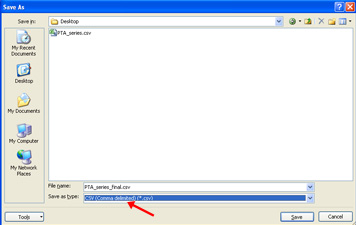
Step
15:
We're almost done.
You need to save your Excel spreadsheet as a .csv
file. Go to "Save As", give it a name and make sure
"CSV (Comma delimited) (*.csv)"
is selected in the "Save as type" drop down box.
Note:
For Mac users, you must save this file as "Windows Comma
Separated (.csv)" type. It will not work with GSAK if you save
it in the native Mac CSV format.
|
|
|
|
Step
16:
It's time to open
GSAK once again. You will need version 8 or higher to accomplish
this next series of steps.
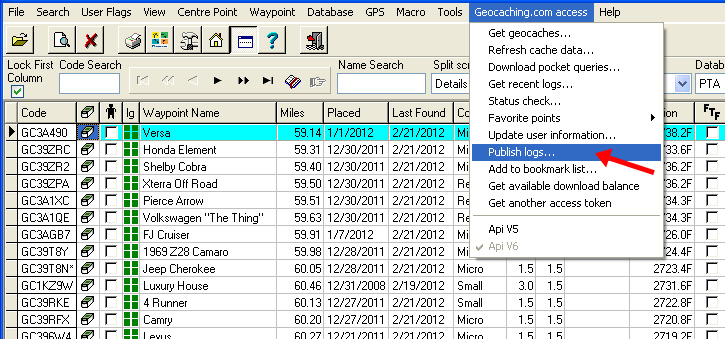
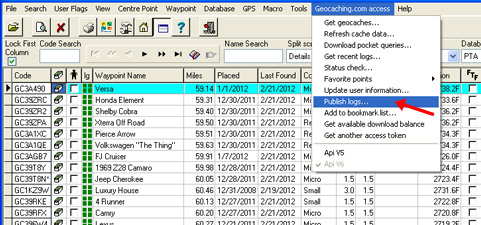
Under the "Geocaching.com
access" heading, select "Publish logs...."
|
|
|
|
Step
17:
Important: Before you do this step, make sure you don’t
have an active template. Click
on the “Templates” button at the bottom of the box and in the
window that opens, delete anything that’s in the white box (I
learned this the hard way; after publishing 1400 caches, I discovered
that all my logs were changed to the template I used last time
I published logs. There’s no easy way to edit 1400 logs).
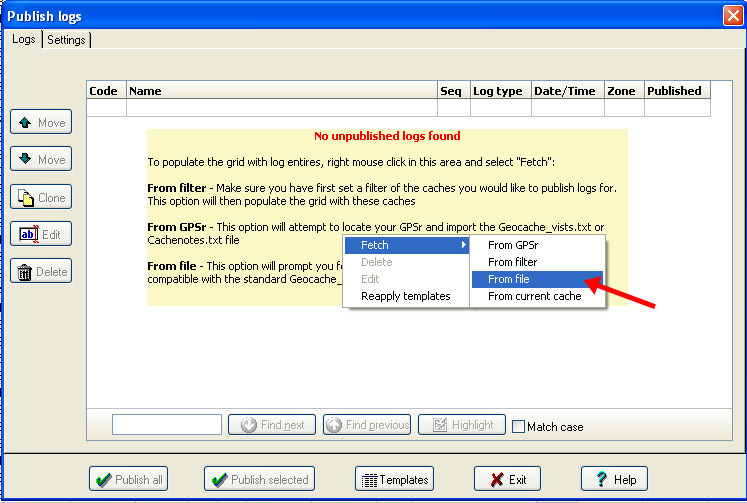
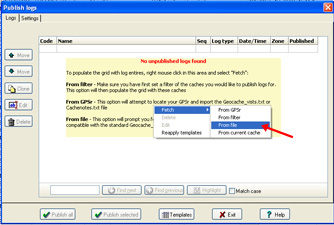
In the box that
pops up:
- right
click in the yellow area
- mouse
over "Fetch"
- click
on "From file"
|
|
|
|
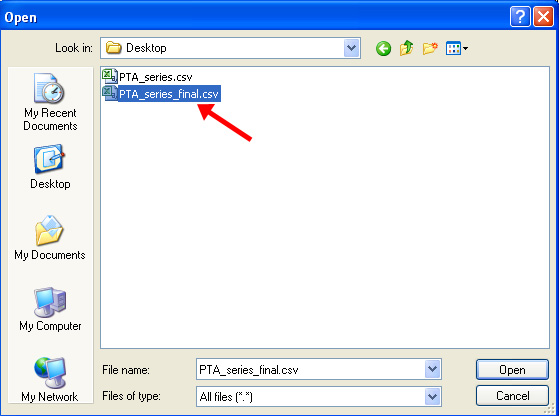
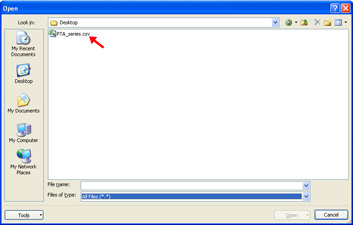
Step
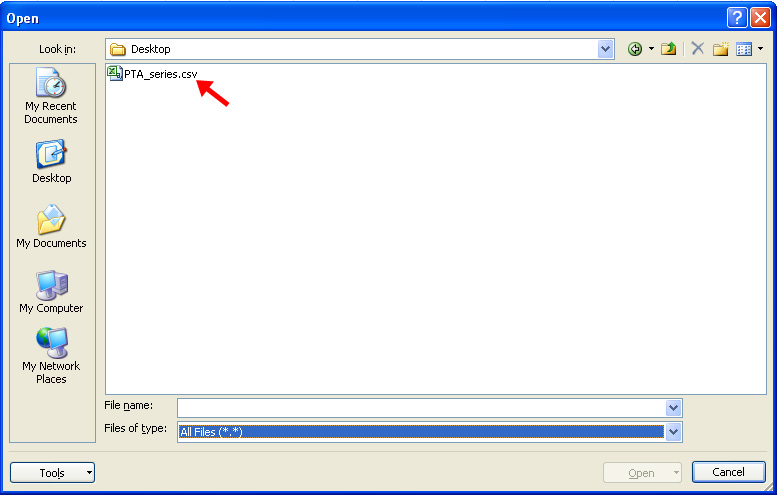
18:
Find the .csv file you created in Excel and click "Open".
|

|
|
|
Step
19:
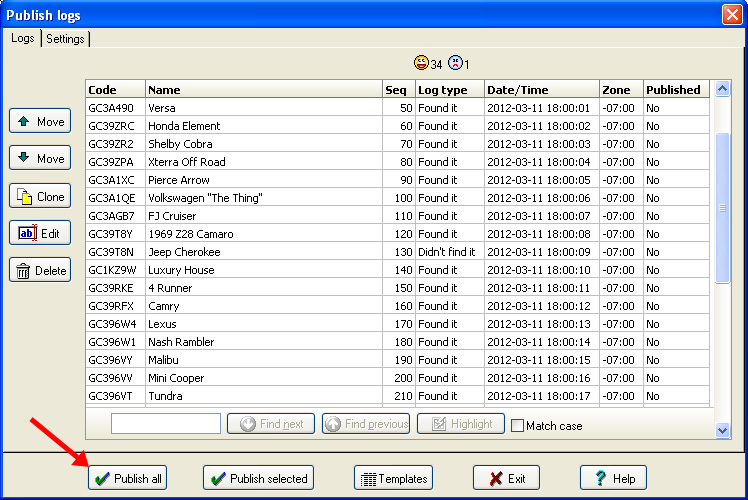
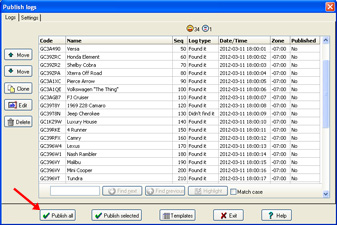
You should now
see a "Publish logs" box that will populate with your
caches. If you already have these caches in a GSAK database,
this process should only take a few seconds.
If they are not in a database, GSAK will retrieve them
from Geocaching.com which will take from 2 to 3 seconds per
cache once things get going.
I
strongly recommend that before you do the next step, that you
publish just one cache and check it on Geocaching.com before
you push the "Publish all" button. This may save a
lot of grief if something is not quite right.
Once all your caches
are loaded, push the "Publish all" button and your
caches will automatically transfer to Geocaching.com. Depending
on how many caches you have, this could take quite a while (approx.
2 to 3 seconds per cache). Take a break, have lunch, relax,
GSAK is doing the rest of the work for you.
That's it!
|
|
|
|
Troubleshooting:
I've
added this section as a collection of comments from users who have
had a problem with the above procedures. They don't necessarily provide
answers to all problems but may give some assistance or ideas in how
to solve them. If you've got anything to add, please send it to me
and I'll add it to the list.
- First,
don't forget I'm on a Mac, so I'm not sure what's going on with
Excel in Windows. But, when I save a .csv file out of Excel, I have
TWO options -- one is to create a file using "Comma Separated
Values (.csv)" and the other is "Windows Comma Separated
(.csv)". One
would think they would both be the same, but when I first tried
using this publishing feature in GSAK, I kept having a problem where
only the first file would load, then nothing else. I discovered
that I had to save the file using the second option above (Windows
Comma Separated…)So,
I took both files that you attached and tried to load them into
GSAK -- peace1 only loaded the first cache, then it stopped, just
like you said. Then I tried using peace2, and it all went in without
a problem.I
then loaded the peace1 file into Excel and simply re-saved it as
a "Windows Comma Separated (.csv)" file (with a different
name to tell the two apart), and I went back to GSAK and tried to
load that one -- IT WENT IN SUCCESSFULLY.Again,
I don't understand the difference between the two options, but obviously
there's SOMETHING that makes one different from the other. And I
don't know if Excel running under Windows offers both options, or
how YOU do it on your end.It
definitely makes a big difference on MY end -- success or failure.
- Come
to think of it, I received an error and the upload process stopped
about 835 caches in. I checked GC.com and my total had increased
by that amount. They had gone live, at least, So I restarted the
"Publish all" command and the remaining caches went up
with no further stoppage. *shrug*
- I
had a little glitch. When I created the csv file and did the fetch
from file in gsak it only read 4 caches from the list. I had to
remove any of the formatting like fill color and comment "wrapping"
in column d ( i think it was). Then create the csv again (5th try).
All went without a glitch after that.
- It
took four times to get them all loaded last night. Sometimes it
just stopped, but I started it back up where it left off -- it finally
finished and the number count was correct in the end.
- I
loaded the NEWEST version of GSAK 8.3.1B77 and that fixes the problem…
|