
|
continued |
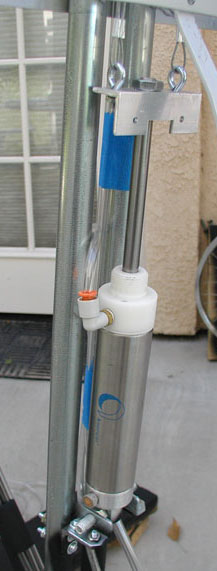 |
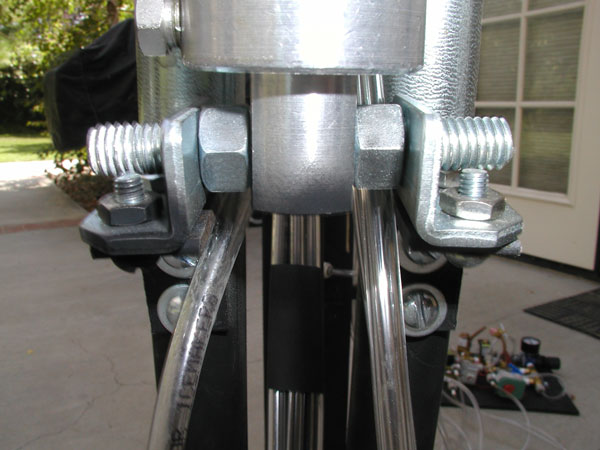
The arm mechanism consists of a single pneumatic cylinder (4" travel) with cable linkage to the arms by way of a pair of pulleys and a spring return on the arms. This set up works very well, keeps the weight to a minimum and keeps the center of gravity fairly low. | 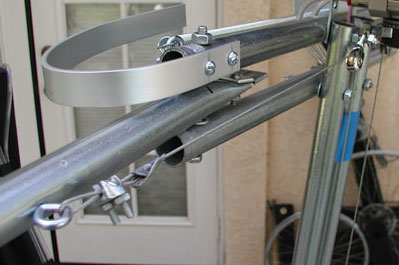 |
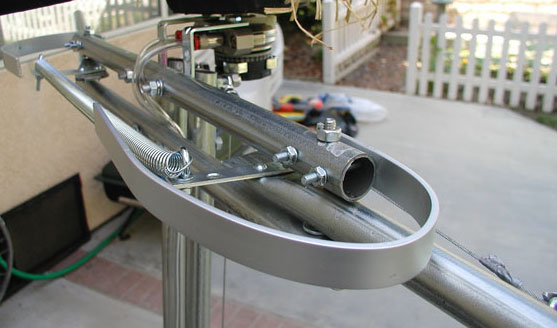 |
At left is a back view of the right shoulder showing the return spring. The flat aluminum bar is a guard to keep his shirt out of the mechanism. At right is a close up of the left shoulder mechanism. |
 |
 |
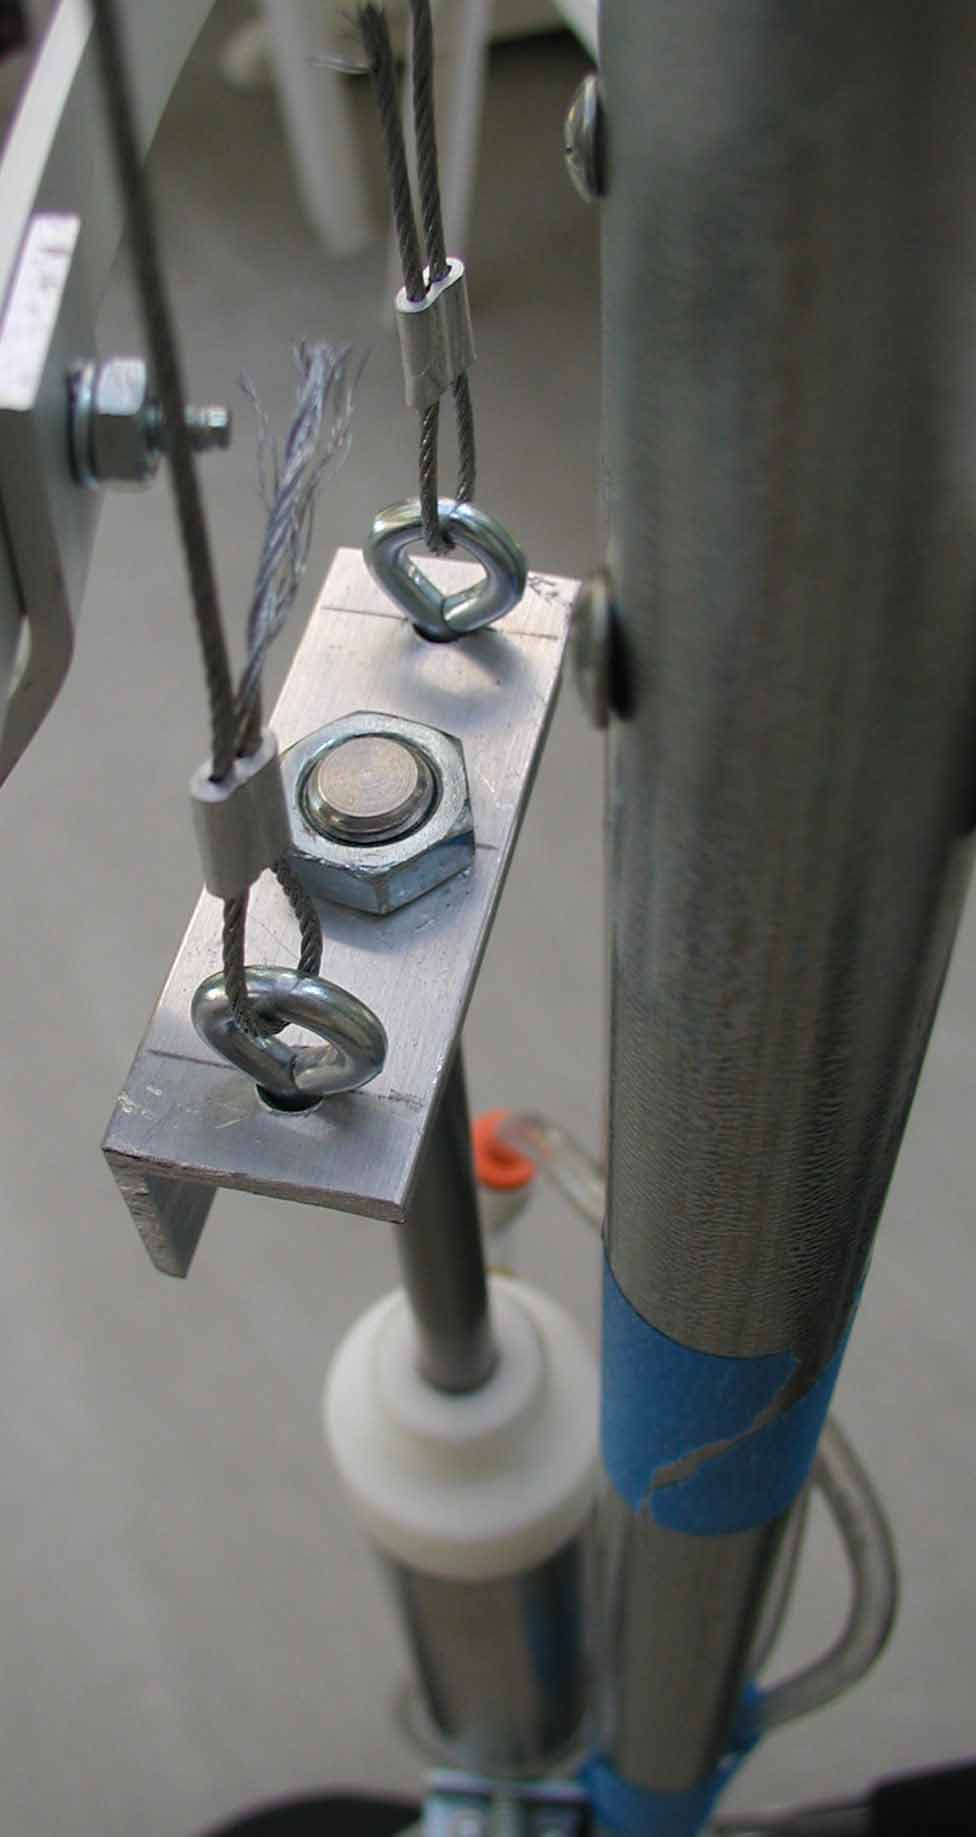 |
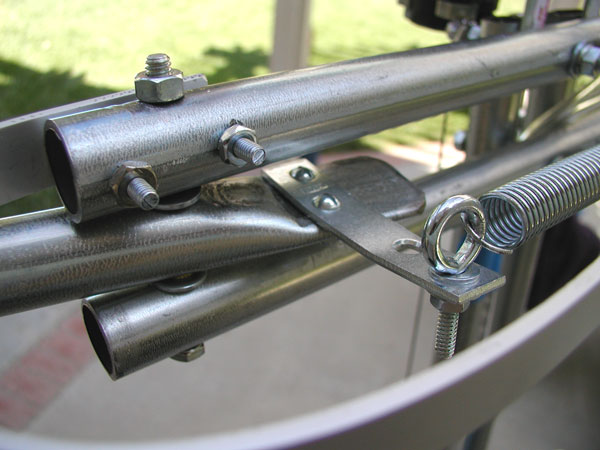
At far left is one of the pulleys. Left is the top of the cylinder and the cable attachment. At right is the cylinder mount. |
 |
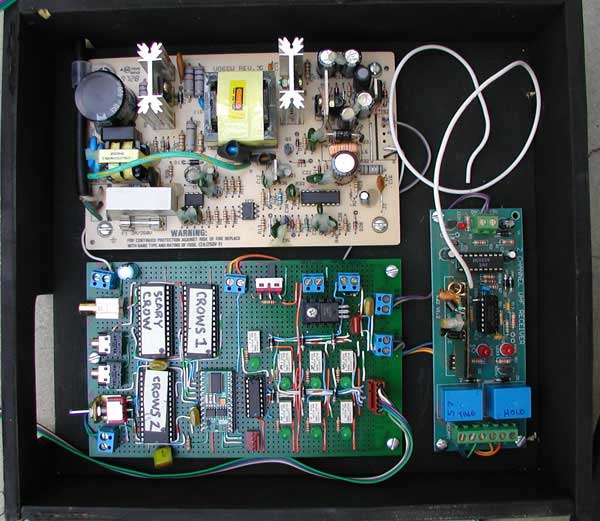 |
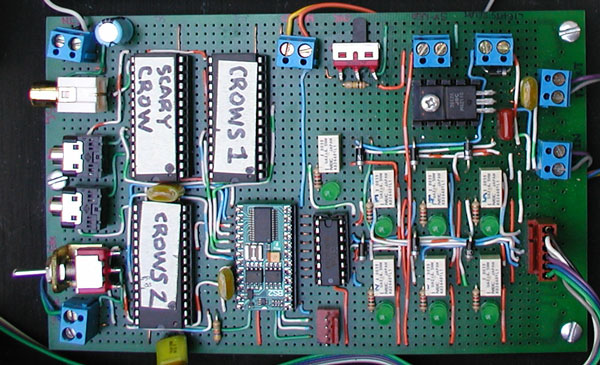
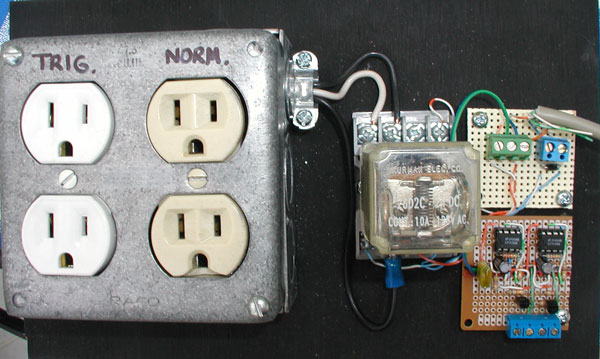
At left is the electronics package. It consists of a 5/24 volt power supply (upper), a receiver for the remote (right) and the main circuit board. At right is a close up of the main circuit board. It's based around a Basic Stamp 2 (lower part of board, left of center). It also includes three ChipCorders, which provide sound for the crows and the Scary Crow, seven relays for control of lights and solenoid valves and a 12 volt regulator for the remote receiver. Click here for a schematic in PDF. |
 |
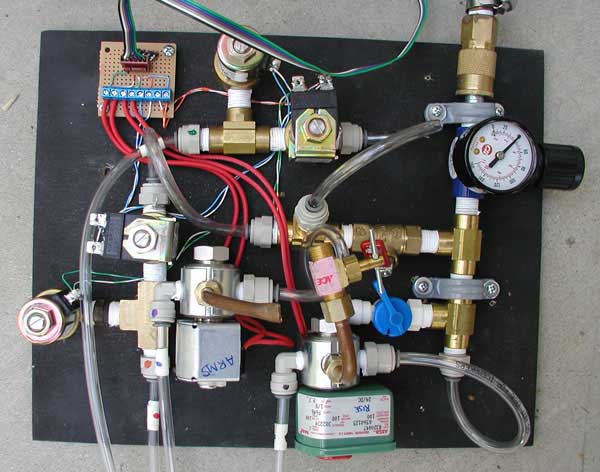 |
To the left is the "Ebay special" pneumatic control board. I purchased the solenoid valves over a period of several months off Ebay and that's why there's such a variety. All the valves are 24 volts. The main lifting cylinder requires about 38 psi, the arms and head require lower pressures and therefore have flow limiting valves. At right is the lighting control board. Normally, the Scary Crow will be lit with dimmed white light. When triggered, the lighting will change to red (or whatever looks the scariest). |
 |
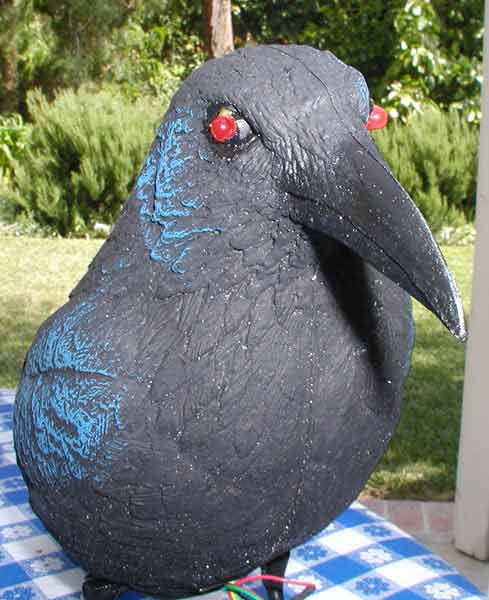 |
The crows that will be surrounding the Scary Crow are from Cablea's. They're very nice, full sized, hollow plastic birds. They have led eyes that were fairly easy to install. The lighting board has circuitry that pulses the eyes when the effect is triggered. | 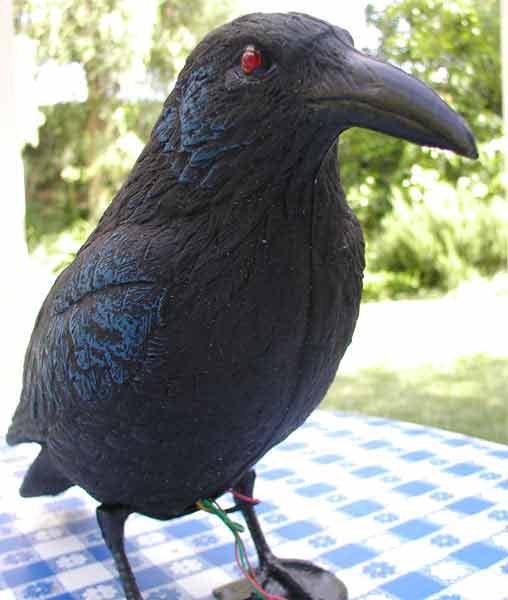 |
| Back to page 1 |
| Halloween Home | last update 11/2019 |