VMusic2 MP3 Player
Using it with a BASIC Stamp 2 or Prop-2
(most of the pictures can be clicked on for a larger image)
|
|
VMusic2 MP3 Player Using it with a BASIC Stamp 2 or Prop-2 (most of the pictures can be clicked on for a larger image) |
|
Something to note before we get started:
|
 |
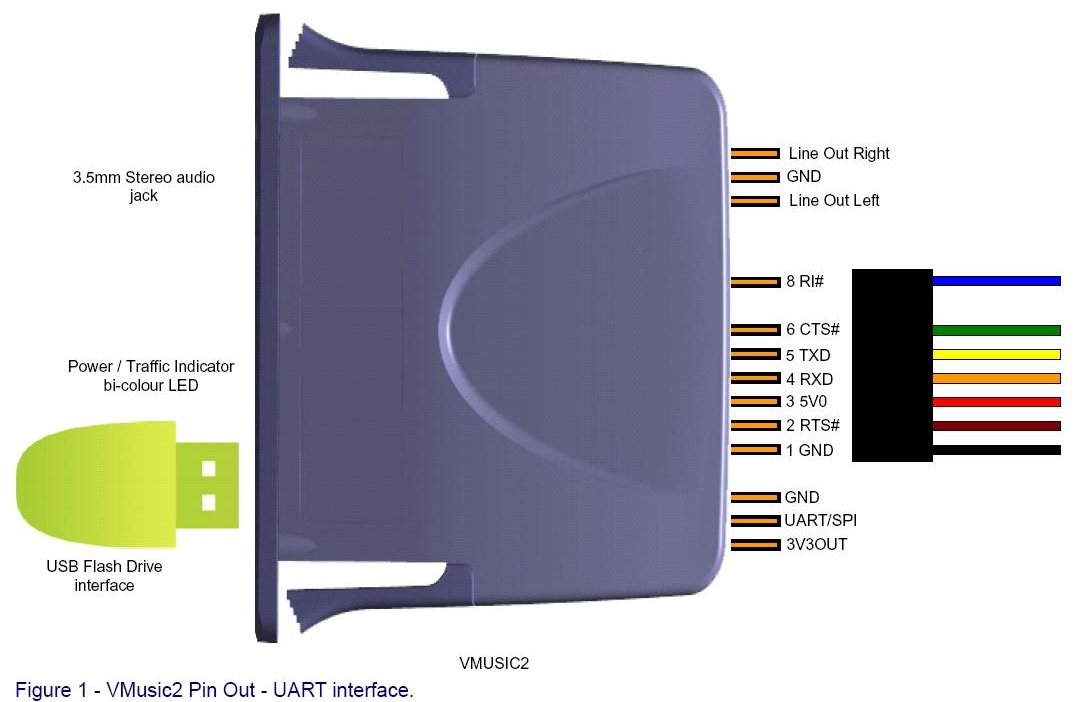 |
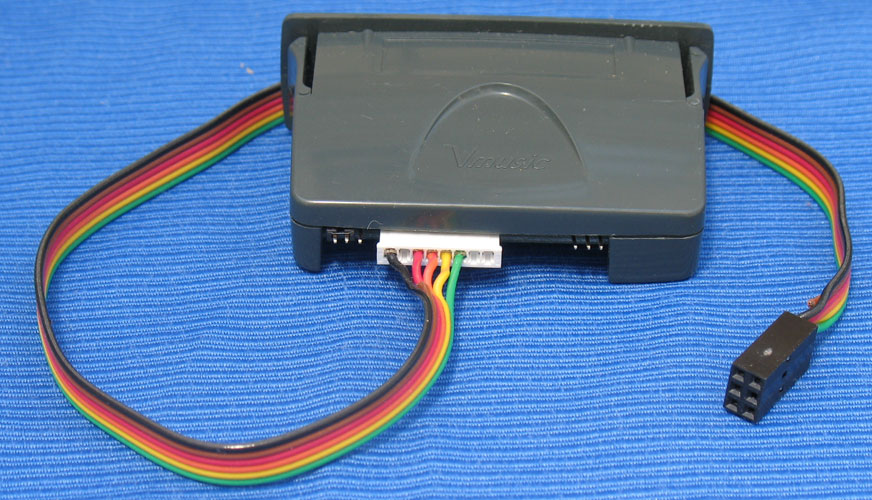
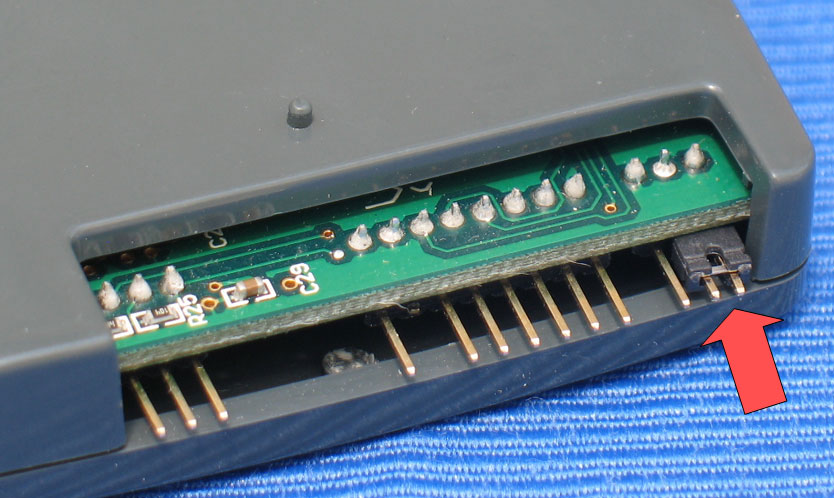
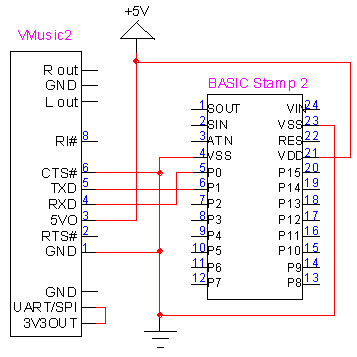
The drawing to the left shows the pinouts for the VMusic2. The pins we'll be using are 1 GND, 3 5V0, 4 RXD, 5 TXD and 6 CTS# The upper pins are for left and right audio output channels if you'd like to use those instead of the jack on the front. The lower pins come with a jumper installed. For our purposes, be sure the jumper is on the outside pins as shown right. |
 |
|
Here's a basic schematic for hooking up a BASIC Stamp 2 to the VMusic2. Information on wiring the Stamp for programming can be found on the Parallax website.
|
 |
 |
|||
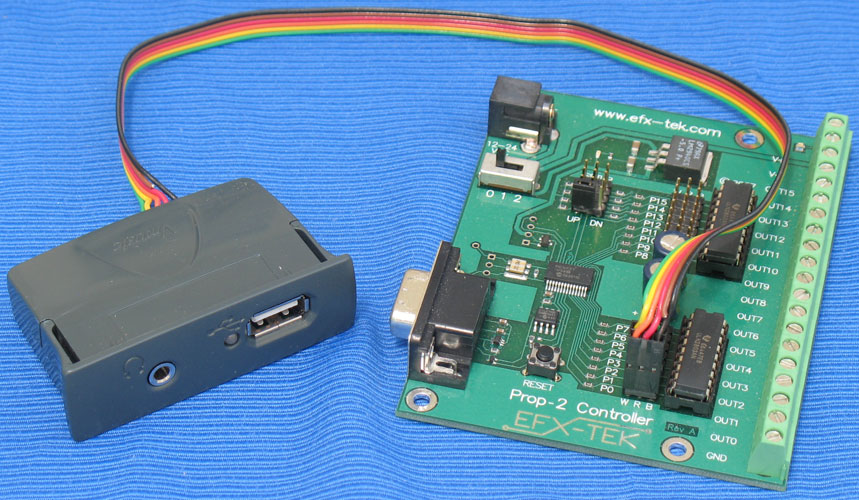
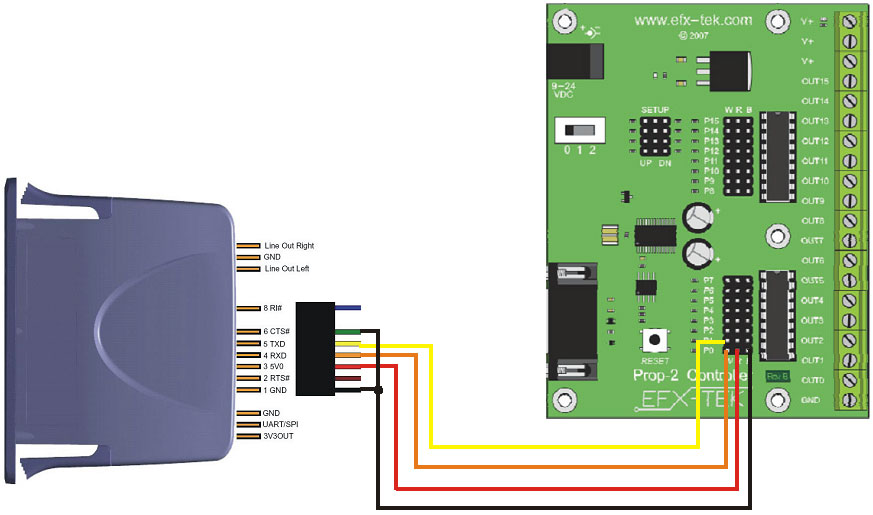
| Here's a diagram on wiring the VMusic2 to a Prop-2 controller. Note that the VMusic2 gets its power from the Prop-2 (the Prop-2 needs to be powered as usual). We're using pin 0 (P0) on the Prop-2 to send commands to the VMusic2 and pin 1 (P1) to receive from the VMusic2. You'll only need this second connection if you want the VMusic2 to tell the Prop-2 when a selection has finished playing. Pin 6 (CTS#) on the VMusic2 goes to ground. |
|
The download below gives you the latest firmware revision for the VMusic2 (3.66 as of 1/09) and changes the it to the "extended command set" which I feel is a more user friendly command set. The demo program I'm offering uses this command set. IMPORTANT NOTE: This file is currently called "ftrfb_9600.ftd" for identification purposes. Once you download it, you must change the name to: ftrfb.ftd in order for it to work properly. Download this file to your computer, change the name as described above then transfer it to your USB flash device. Insert the USB flash drive into the socket on the VMusic2 and power it up. Within about 30 seconds, the firmware will update automatically. You can now delete the ftrfb.ftd file from the flash drive or leave it on, it doesn't matter. |
 |
|
OK, we're getting close to trying the VMusic2 out. The download to the left is a program for the BS2/Prop-2 that will allow you to test the VMusic2 and give you an idea how to use the various commands. Download the program, open it with the BASIC Stamp Editor and then load it onto the BS2/Prop-2 as you normally would. For this demo program, you'll need to load some MP3 files onto your USB flash drive. Note that the file names can be no longer than eight characters plus extension (8.3 format). For example, "wolf_sfx.mp3" will work but "wolf_sound.mp3" will not. To use the demo program, load one MP3 track and give it the name "test.mp3" (or you can change the BS2 program to reflect the real file name). Load another track and name it "test2.mp3" Load at least one more MP3 file (name is not important) then plug your USB flash drive into the VMusic2. Plug an amplified speaker (like a computer speaker) into the front jack on the VMusic2. Turn on the power to the controller and the VMuisc2 and within a few seconds you should hear this sequence which will demonstrate various commands:
For details, see the notes contained in the BS2 program. |
||
 |
| That should be enough to get you going. If you've got questions or comments on what I've presented here, please contact me and I'll try to help out. |
|
|
last revised 1/09 |