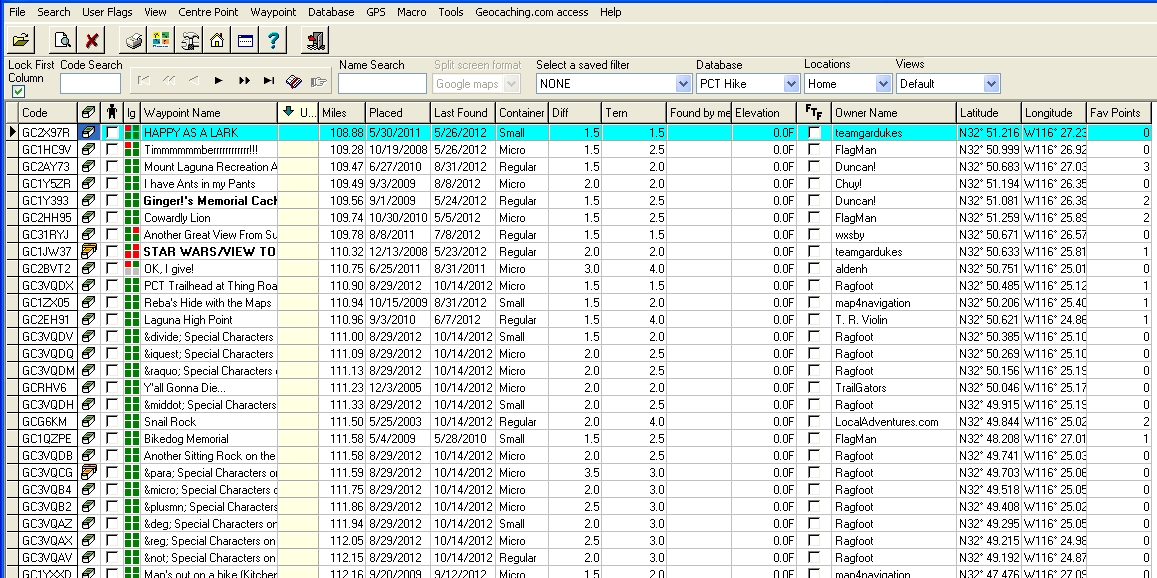
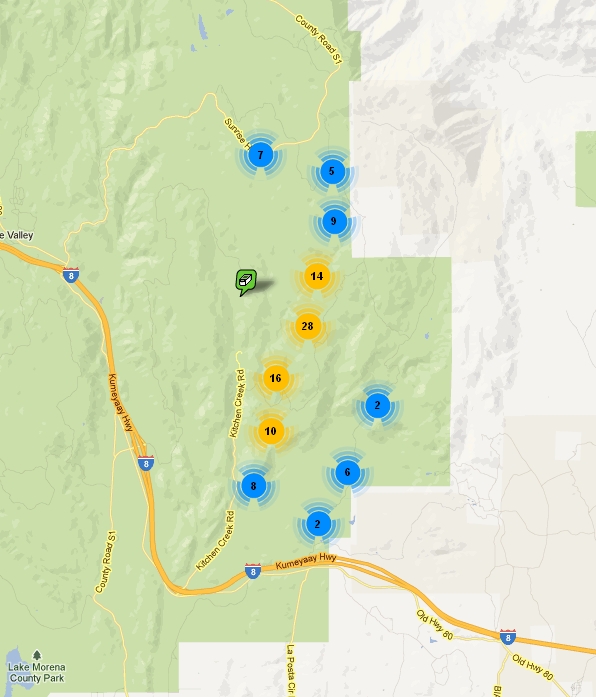
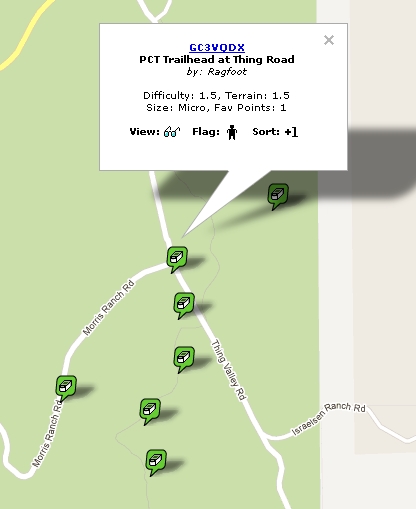
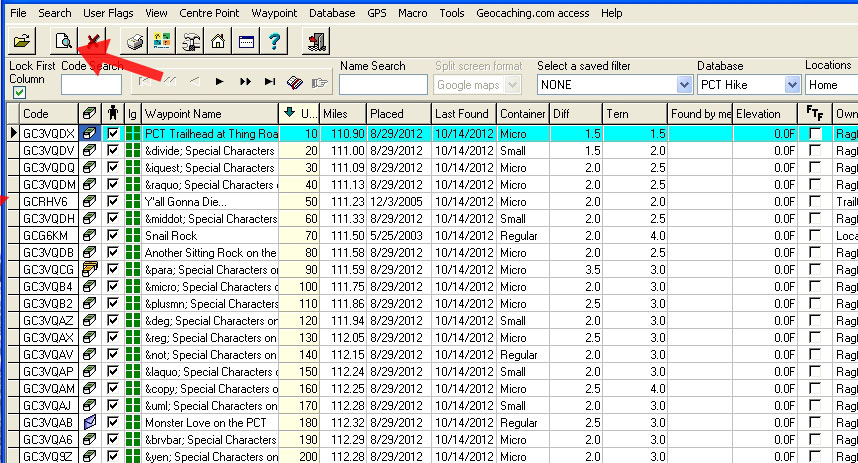
Planning a Geocaching Trip Using GSAK

  This is how I put together a Geocaching trip using GSAK as my primary tool. In this example, I'll plan a trip to the Pacific Crest Trail near San Diego, CA. For most of what I do, GSAK version 8 or newer is required. Click on the pictures below for a larger image.  

Step 1: Add a New Database


We first need to get the geocaches in the area of our trip. You can do this using a Pocket Query on Geocaching.com or you can use the "Get geocaches" function under the "Geocaching.com access" tab on GSAK. We will use the latter. To use this function, we need to start with a blank database on GSAK. Click on the "Database" tab in the upper menu then select "New...."


Give this database a name, in this case, I'll call it "PCT Hike". Click "Create".

We now have a blank database ready to populate with geocaches.

Step 2: Populate the Database


To populate our database with geocaches, click on the "Geocaching.com access" tab and select "Get geocaches..."


A "Get Geocaches" pop-up box will open and present you with a lot of choices. You can choose which ones will work best for where you'll be going. In this case, we will select "Rectangle" as a Reference choice (you'll see this in the next step on the map), we'll get a maximum of 200 geocaches and we will get 15 logs per cache (a Pocket Query normally returns only 5 logs per cache). After your choices are selected, hit the "Google Map" button.

A map will pop up with a purple rectangle (or whatever choice you selected above). You need to maneuver this map to where you'll be going then place the purple rectangle over that area. You can adjust the upper left and lower right corners of the rectangle to cover the area where you want to geocache. This function will return all geocaches within the rectangle.

After you've selected your area, hit the "Return Coordinates" button at the bottom of the map.


The pop-up box will return with the "Top left" and "Bottom right" coordinates filled in. Click OK.

Your blank database will now be populated with geocaches from the area you selected on the map.

Hint: If you've already found some caches in this database but you want to pass it along to your friends without these finds reflected, you can temporarily change them from found to not found by doing this:

  • In GSAK, select the Tools tab then click Options/Advanced.
  • In the box that pops up, uncheck the "Interrogate logs" box shown right.
  • Click OK
  • Next, under the Database tab, select "Global replace..."
  • In the Global Replace box, select "Found Status" from the "Replace" box and "Not Found" in the "With" box.
  • Click Replace
  • Your finds in the current database will change to not found. You can restore them by refreshing the database, be sure you check the "Interrogate logs" box in the Advanced Options box before doing this.

Step 3: Choose Your Columns


Note that there are a several columns with data on your database, yours will probably look much different than mine. You can easily choose which columns you want to see and which ones you don't. To do this, click on the "Tools" tab and select "Options".


In the pop-up box, click on the "Display" tab. You will now see the many column options available. Put a check mark by those you want to display and remove the check mark from those you don't want. It may take some trial and error to figure out which ones work best for you.

For our purposes, be sure to check the "User flag" and "User sort" boxes, they'll come in handy very soon.

Step 4: Set User Sort Values

While we're in the options menu (see step 3), click on the "General" tab. On the left side, you'll see a couple of boxes under the "User Sort" heading. For "Current Value", set that to "0" if it's not already there and for "Increment By", set that to "10". We'll talk more about these values later.

Click "OK" to exit the options menu. When back on the main GSAK page, you can drag the columns around to place them where ever you like.

Step 5: Get the Google Map Macro (skip to Step 6 if you've already got it)

We've now got our database containing geocaches but there are probably more than we need and they're not in any kind of useful order. Here's where the real fun begins, we're going to add a macro to make it easy to select the caches we want.

Click on the "Macro" tab in the upper menu and select "Run/Manage".


In the upper left corner of the box that pops up, click on "Online Macro Index".

You'll now be presented with dozens of choices for macros that run on GSAK, some are pretty useful, others are not. The one we want is called "Google_Map_V3", scroll down until you find it then double click on it.

You will be taken to a website where you can download this macro. Click on "Google_Map_V3.gsk". Note that the version number and appearance of the website may change due to updates.

A pop-up box will appear as shown at right. Select "OK"

In the next pop-up box, select "Install the macro" then hit "Go".

"Google_Map_V3" will now be one of your macro choices.

Step 6: Choose your caches from the Google Map


From your "Run Macros" box, select "Google_Map_V3". You'll get a map that looks something like the one to the right.


Click on one of the colored circles in the above map and you'll see a map with individual geocaches.

Now click on the first cache you want to go to. You'll get a pop-up box with info on the cache. Next to the word "Flag" there's 
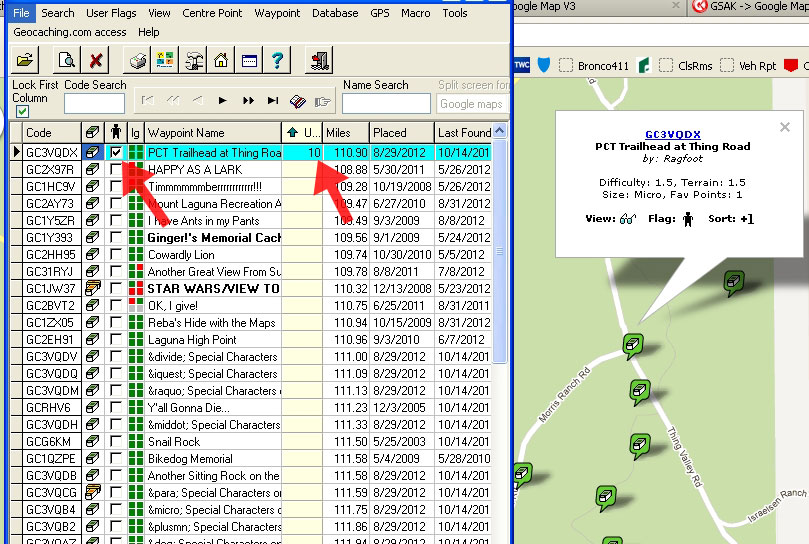
a little man, click on that. When you do this, the main GSAK page will appear and the box in the "Flag" column for that 
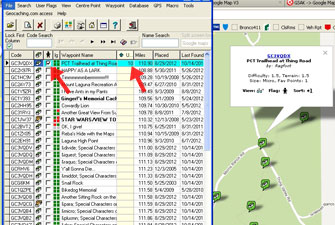
cache will be checked. Now go back to the box on the map page 
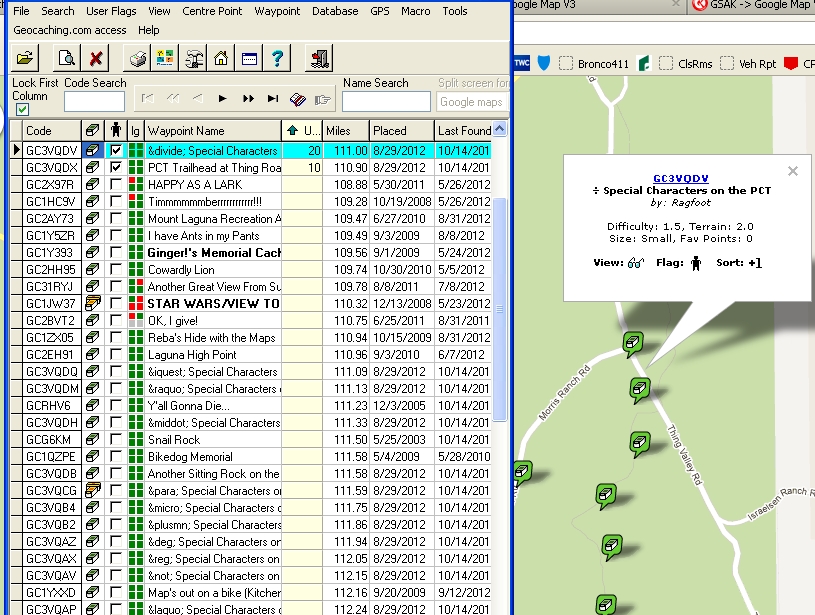
and click the "+1" next to "Sort". GSAK will once again appear and the "Usort" column will have the number "10" next to that first cache.
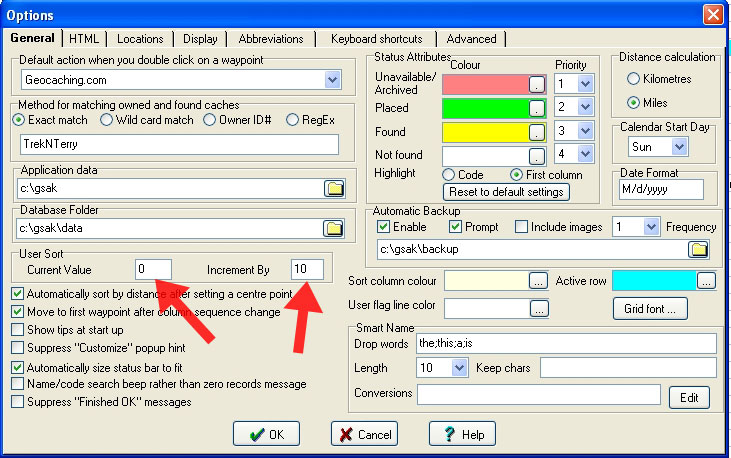
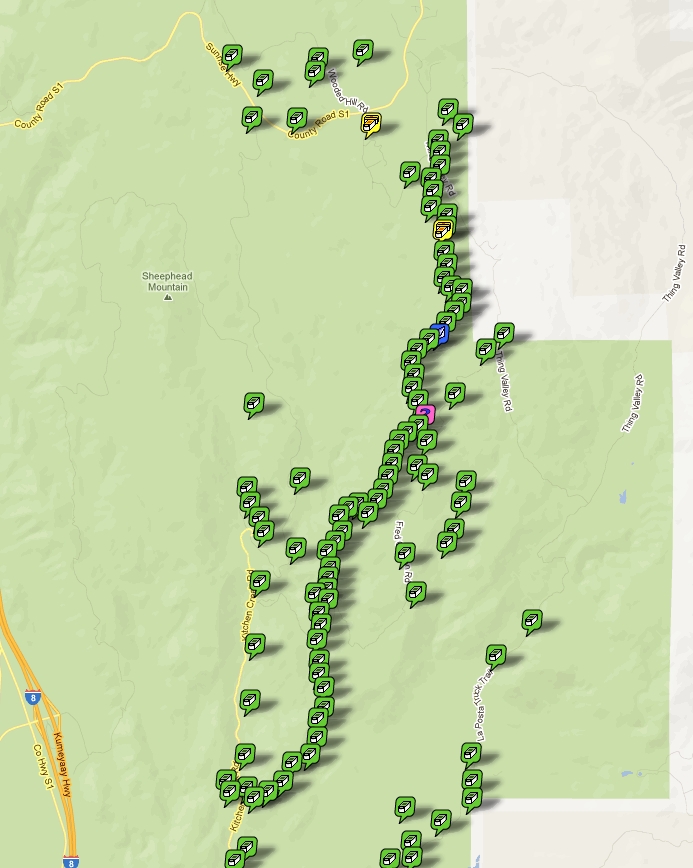
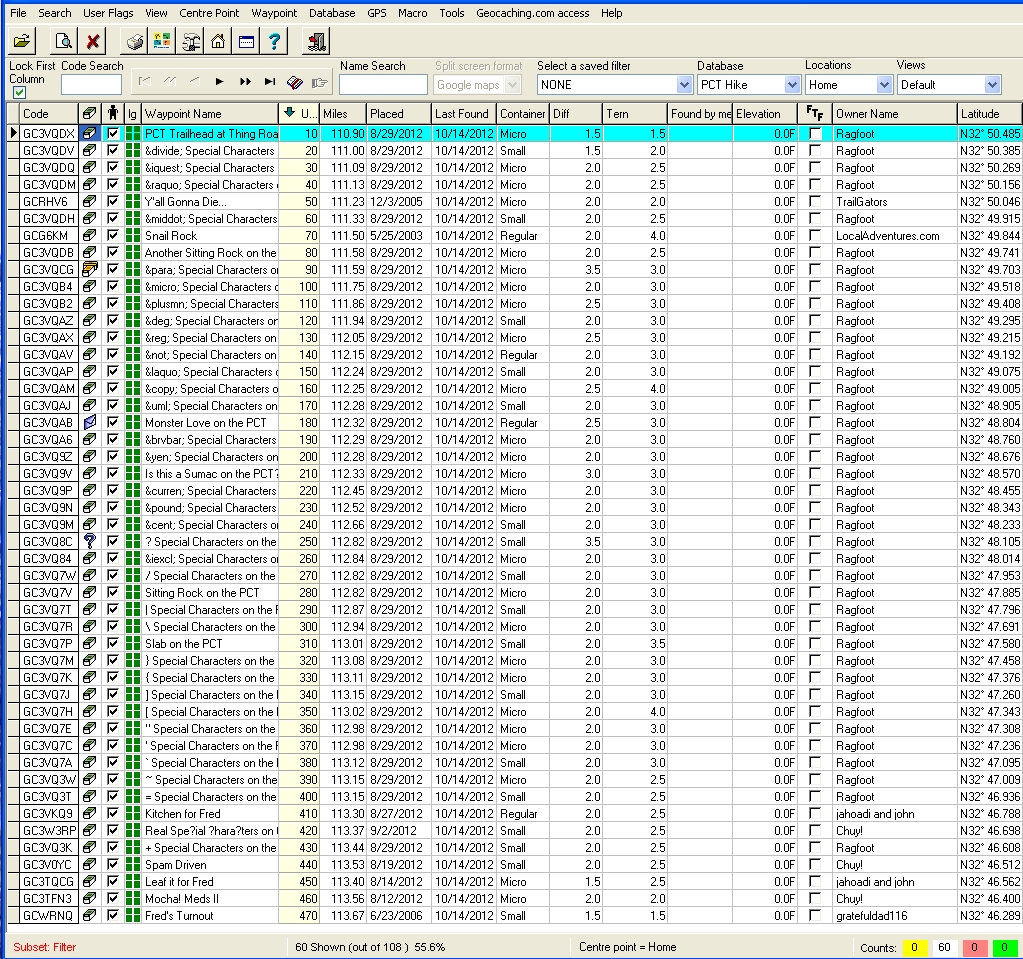
Note on Usort numbers: Back in step 4, the Usort current value was set at 0 and the increment by was set at 10. In clicking the +1 on the map, we added the increment value to the usort value which is why we returned a 10. You are welcome to set the increment value at any number you choose, I like to set it at 10 just in case I want to add any other caches after I make my initial routing. As an example, if I add a cache before this first one, I can assign it the number 5 (or anything before 10). This allows a great deal of flexibility.


Go back to the map and click on the second cache you'd like to find. Use the procedure above to set the flag and usort numbers for that one.

Continue with the above procedure until you've given all the caches you'd like to visit a usort number and check mark in the flag box.

Now let's say there are some caches that are not on the planned route but you might want to pick them up when you are traveling to or from your main route. You can give them a distinctive set of usort numbers by going back to the options menu under the tools tab and entering a different "Current Value" number, maybe 1000. You can continue adding caches and they will appear as shown right.

Step 7: Filter out just the caches you want


You've now selected the caches for your trip but the GSAK database also contains the extra caches that were imported from the map. There is a quick and easy way to filter out the unwanted caches, just click on the "Filter" icon (see right)


In the box that pops up, go midway down to where it says "User Flag". Un-check the "Not Set" box and click "Go". You'll now return to your database and only the caches with the user flag box checked will be showing.

Step 8: Database is ready to go

If they're not already in numerical order, you can click on the top of the Usort column to order the numbers.

Your database is now ready to load to your GPS receiver, but there are a few more things you may want to do such as:

Click on one of the above for more information.

 
Contact Me for questions or comments
last update 2/17/2014